如何設定|會員註冊自訂欄位
2026-05-20
說明:
- 如果商家想要了解顧客更多的個人資訊,且可以使用額外資料進行受眾分群的廣告投放,即可依照此篇文章的步驟,依序操作。
- 如果商家有啟用「加入會員購物金」的功能,就會建議可以將「生日」設定為「必填」欄位,以避免顧客註冊會員後,忘記填寫生日,而損失了「加入會員購物金」的會員權益。
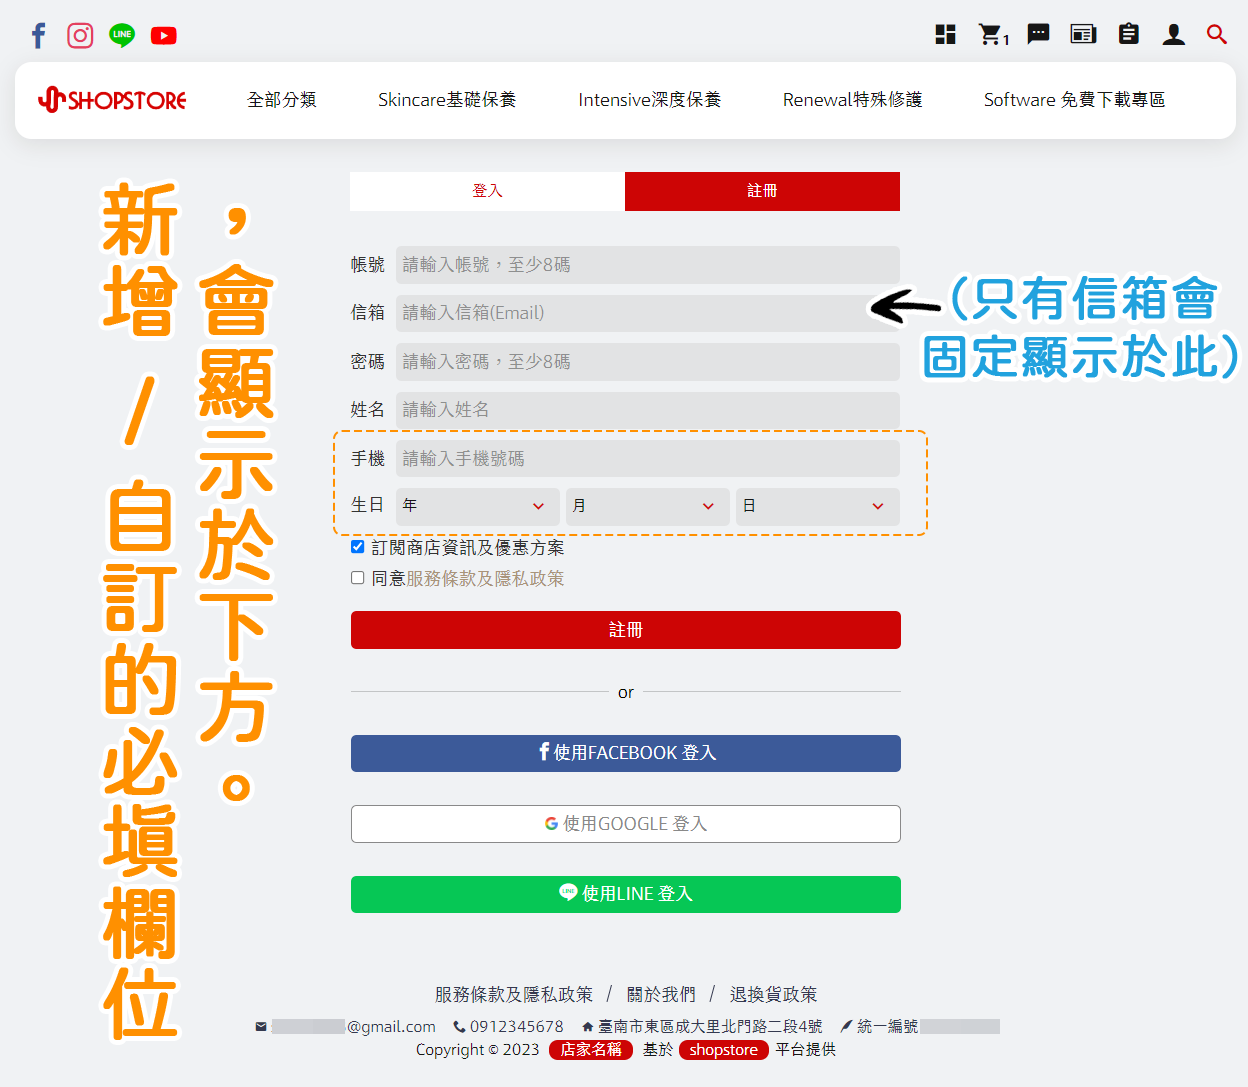
一、前台顯示
商家在後台設定完成「會員註冊必填欄位」與「會員註冊自訂欄位」後,即會顯示對應選項於「會員註冊頁面」,顧客可以輸入對應欄位。
二、如何設定必填欄位?
Step.1
登入「Shopstore店家管理後台」→前往「會員管理」→「顧客列表」。
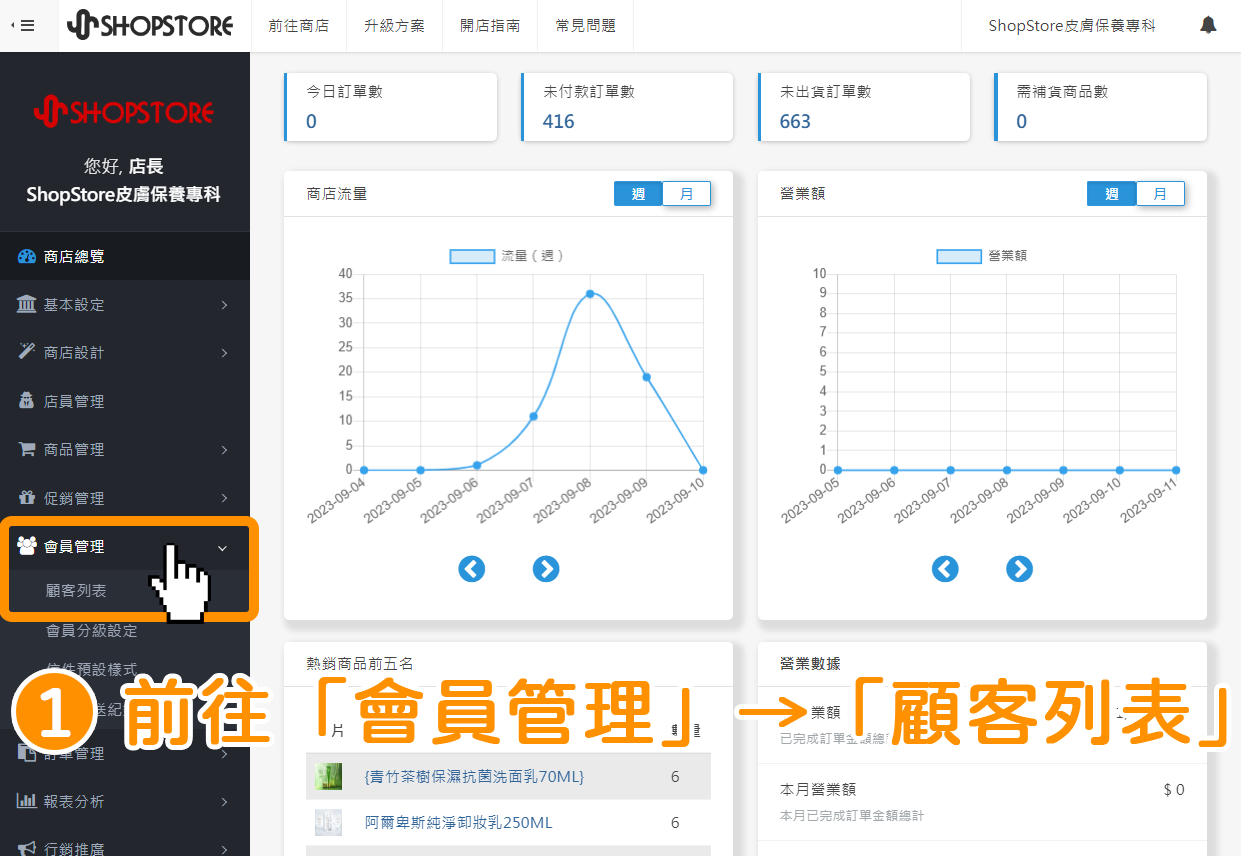
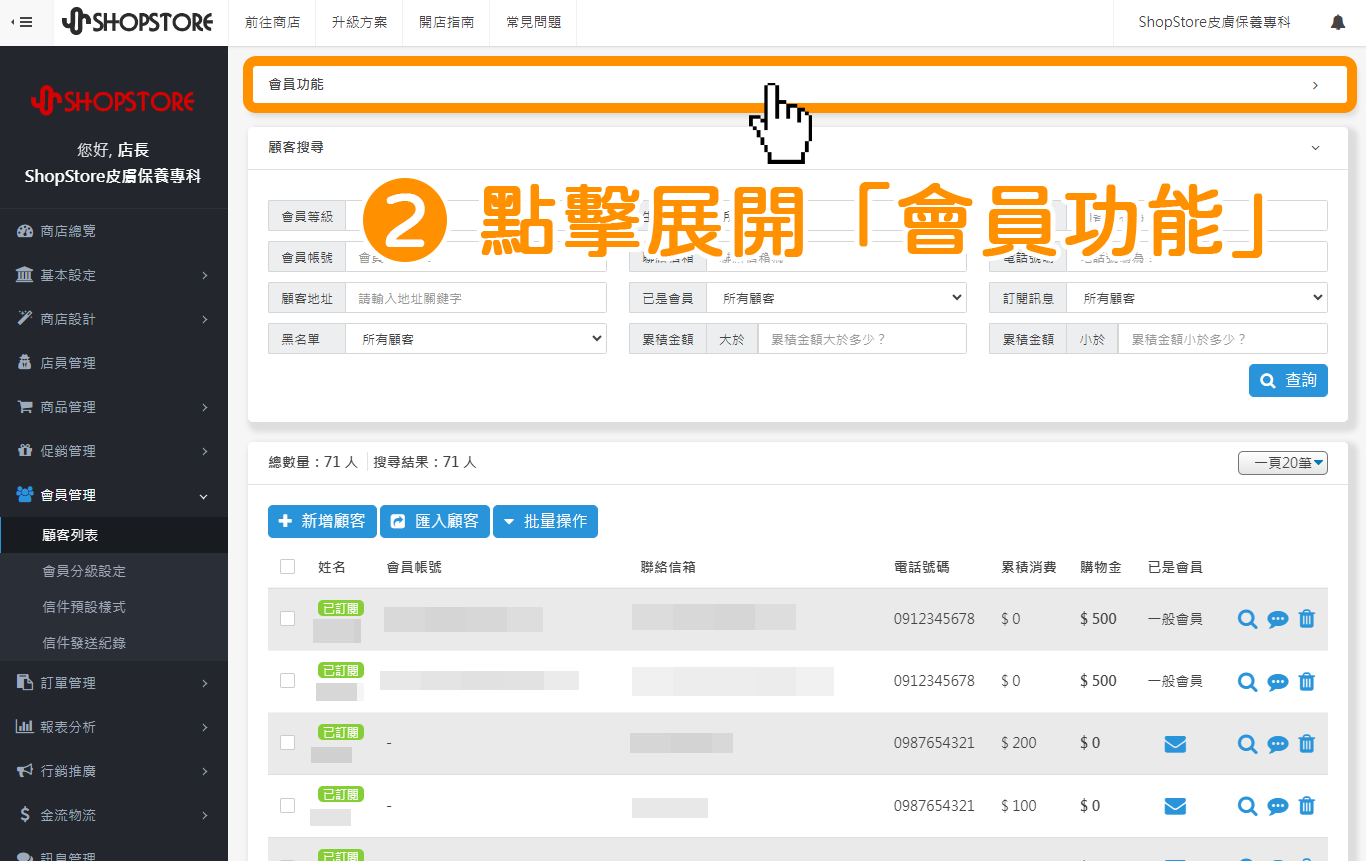
Step.2
點擊展開上方「會員功能」設定區塊。
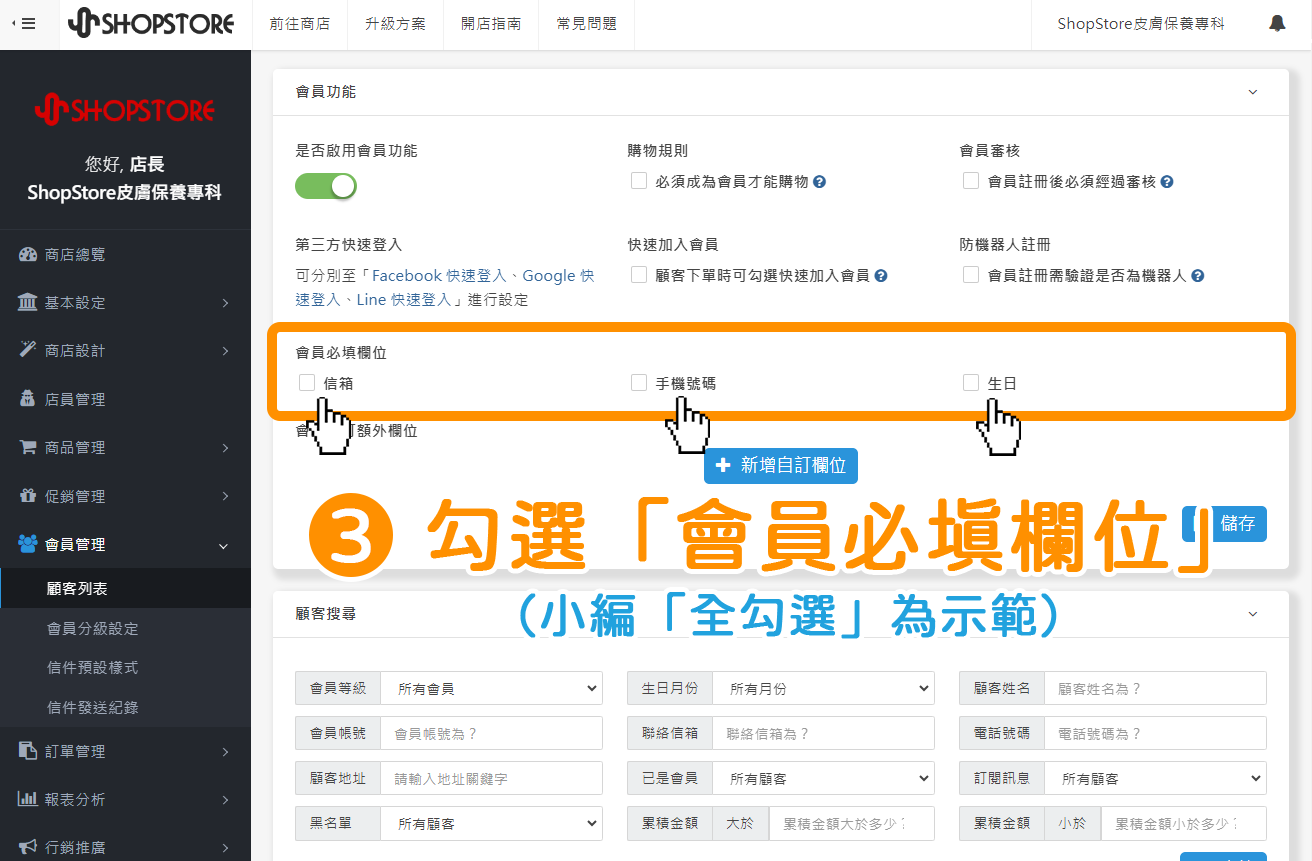
Step.3
在「會員必填欄位」區塊內,勾選想要顯示於「註冊頁面」上,且是為「必填」的欄位有哪些。
Step.4
確認設定的資訊皆正確後,點擊右下方藍色按鈕「儲存」即可。

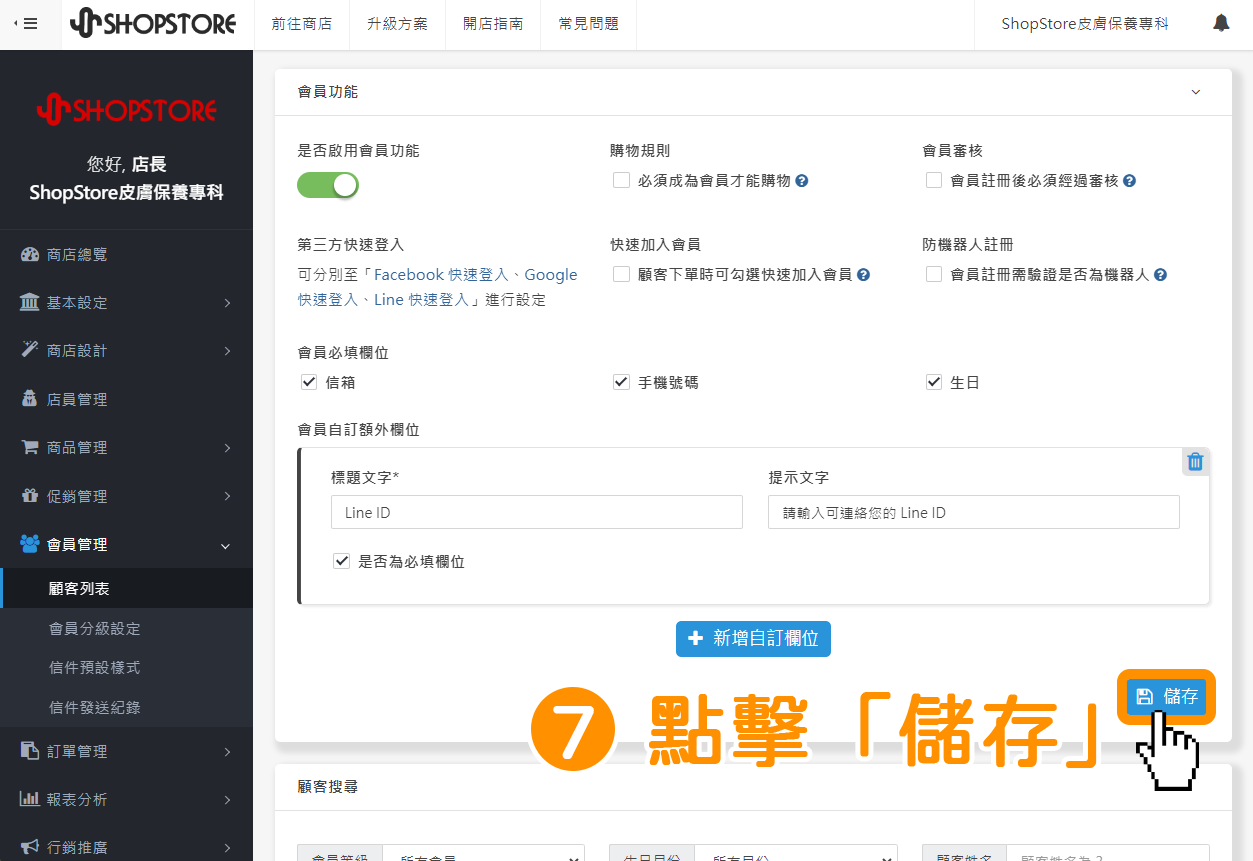
三、如何設定會員註冊自訂欄位?
Step.1
登入「Shopstore店家管理後台」→前往「會員管理」→「顧客列表」。
Step.2
點擊展開上方「會員功能」設定區塊。
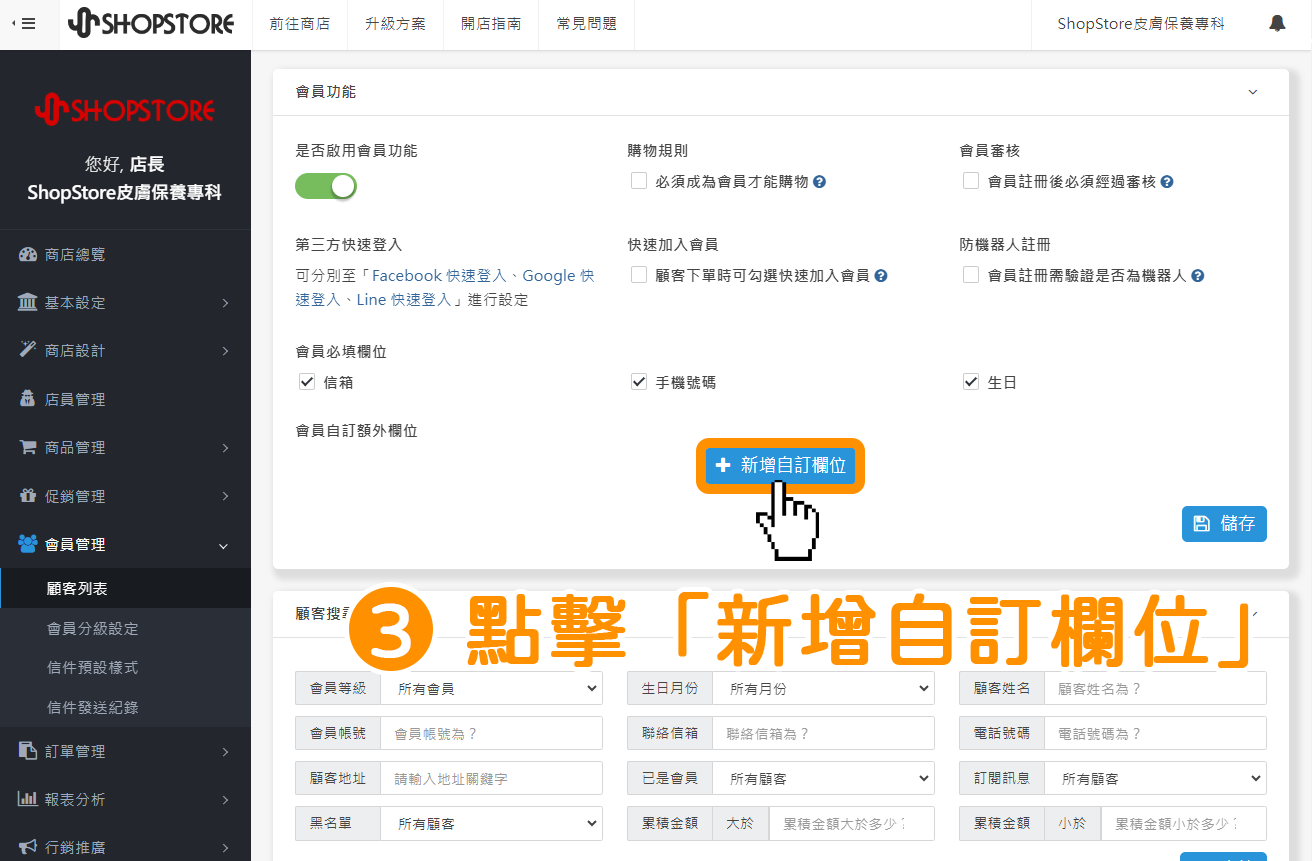
Step.3
在「會員自訂額外欄位」區塊內,點擊中間藍色按鈕「新增自訂欄位」。
Step.4
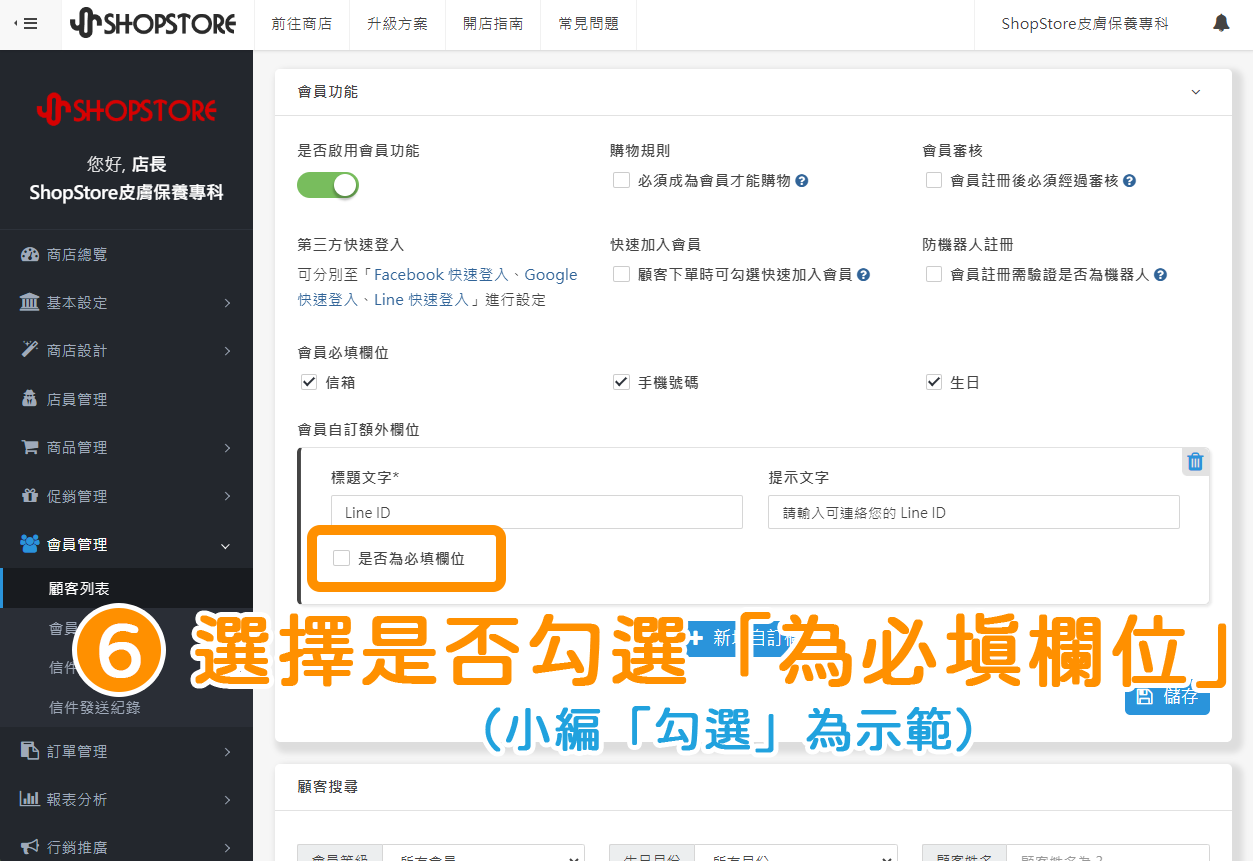
在「標題文字」欄位內,輸入自訂欄位的「名稱」(例如:Line ID、性別等)。

Step.5
在「提示文字」欄位內,輸入欄位編寫的補充說明,引導顧客正確的填寫。

Step.6
可自由勾選/取消勾選「是否為必填欄位」選項。
※小編「勾選」為示範。
Step.7
確認設定的資訊皆正確後,點擊右下方藍色按鈕「儲存」即可。